
How to Export from Ableton Live (The Best Ableton Export Settings)
Oct 18, 2026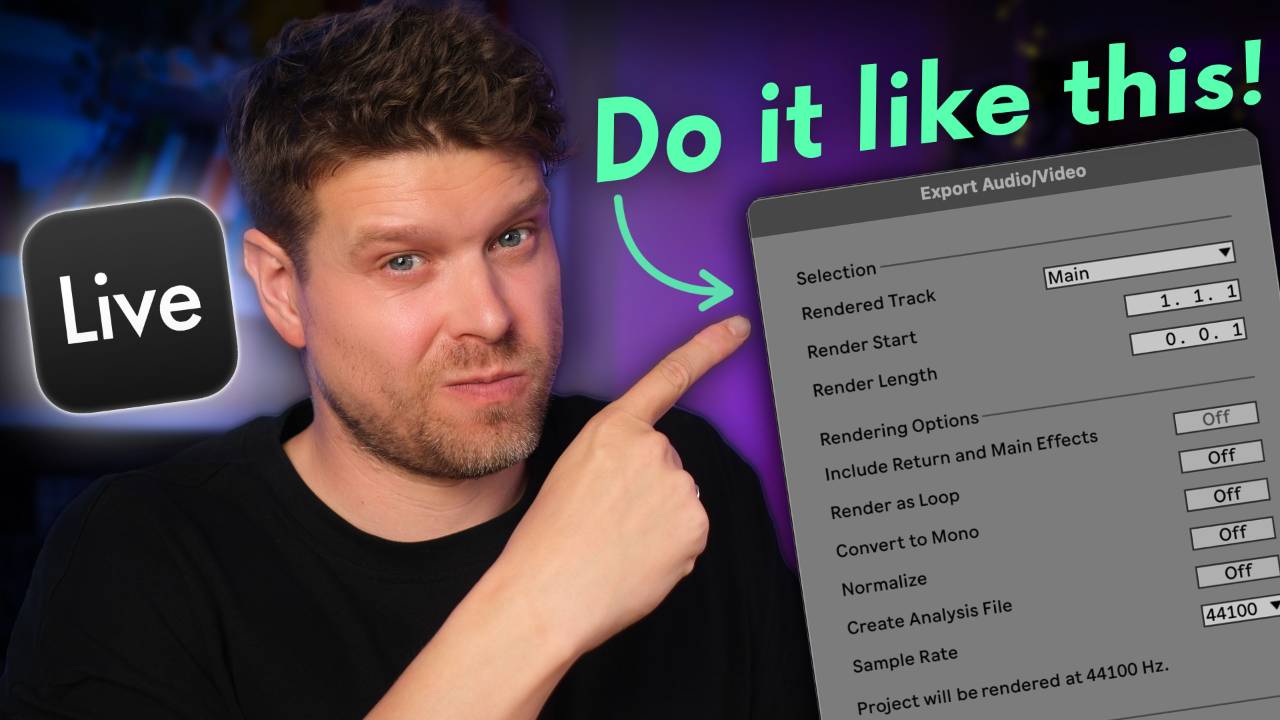
In this article, we'll look at how to choose the right Ableton export settings for your track.
We'll look at what every option does in the Ableton Live 12 export window.
Then I'll show you the settings I use depending on where the file is being sent.
I've had my fair share of experience exporting audio out of Ableton Live, from my own original music to playback for touring artists.
I also teach Ableton Live at Push Patterns and at universities including ICMP and BIMM, helping students get the right export settings for a mix, a master, a live show or a file to send to a mate.
By the end of this article, you'll know which button to press for whatever you're exporting and why, so no more guessing at the export window and hoping the file sounds right.
Key Takeaways on Ableton Export Settings
- Leave space after the last bar before you export. If the loop bracket stops on the final note, reverb and delay tails get cut off.
- Include Return and Main Effects only works when you export individual tracks. It's greyed out on Main, and it should stay off for stems going to a mix engineer.
- Normalize is for quiet demos, not finished tracks. Leave it off for anything heading to mixing or mastering, or anything with a limiter on it.
- 24 bit is the right default for almost every export. Check nothing is clipping first, because 32 bit float inside the DAW hides overs that a 24 bit file keeps.
- The best Ableton export settings for mastering match the mix settings, with Main as the rendered track. A mastering engineer needs 1 stereo file, not a folder of stems.
- For a quick demo, turn Encode PCM off and Encode MP3 on. You get a single 320 kbps MP3 that's small enough to send straight to a mate.
How to Prep Your Project Before You Export
Exporting turns your Live Set into an audio file.
Think of it as an audio screenshot of whatever you hear when you press play.
If a snare is soloed when you press play, a soloed snare is what ends up in the file.
So before you open the export window, sort out what's playing.
Mute any track you don't want in the export.
Unsolo anything you've soloed.
In Arrangement View, set the loop bracket over the section you want to export.
Don't stop the bracket on the last note.
Leave a little space at the end for any reverb or delay tails.
Cutting the tail off is a classic schoolboy error when you first start out.
The track ends like someone pulled the plug, and even a great song sounds amateur.
Exporting from Session View takes 1 more step.
There's no linear timeline, so Ableton Live has no idea how long you want the export to run.
Play the track through and watch the bar count at the top of the screen.
Then type the length into Render Length yourself.
Check the clip launch buttons too.
Any clip that isn't playing won't be in the export.
Once that's sorted, open the export window from File, Export Audio/Video.
The shortcut is Cmd+Shift+R on Mac or Ctrl+Shift+R on Windows.
You'll use it every time you finish something, so it's worth learning.
The window looks busy, but there are only 3 areas that matter for audio.
The video options at the bottom only apply when your Set has video in it, so ignore them.
What Each Ableton Export Setting Does
1. Selection
The first area decides what gets exported.
Rendered Track is the main choice here.
Main is everything coming out of the Main output, and it's what you want for a finished track.
All Individual Tracks exports every track as its own file, which is how you export stems in Ableton.
Selected Tracks Only does the same, but only for the tracks you highlighted before opening the window.
You can also pick a single track by name from the list.
Render Start and Render Length set where the export begins and how long it runs.
2. Rendering Options
The second area changes how the audio is processed on the way out.
Include Return and Main Effects looks broken the first time you see it, because it's greyed out.
It only becomes active once you pick individual tracks instead of Main.
With it on, each track is exported with the effects on the Main channel and any return tracks it sends to.
For stems going to a mix engineer, I turn it off.
They'll want to do their own bus processing and their own sends and returns.
There's a second reason.
A limiter or compressor on Main reacts to the whole mix at once.
Run each stem through it on its own and the stems no longer sound like they do in the project.
The time I'd turn it on is stems for a live performance, where a send effect is part of the sound.
Render as Loop is for sample packs and loop libraries.
Put a reverb on a loop and a normal export starts with no tail, so you hear a small dip at the top every time it repeats.
Render as Loop renders the audio twice and wraps the tail from the end onto the start.
The loop then cycles cleanly with no dip.
For a full song, leave it off.
Convert to Mono is only worth switching on when you need individual mono stems.
If you want to check how your mix holds up in mono, put Utility on the Main channel instead.
Normalize sits in this area too, and it gets its own section below.
Create Analysis File writes a small .asd file next to your audio.
It stores Ableton Live's analysis of the file, including the tempo and warp information.
Only turn it on if the file is coming back into Ableton Live later.
For stems going to a mix engineer, or a final track going to Spotify, turn it off.
Sample Rate needs to match your project.
My project runs at 44.1 kHz, so that's what I export at.
Check yours in Audio settings before you export.
3. Encoding Options
The third area decides how the file gets packaged.
This is where Encode PCM, File Type, Bit Depth, Dither Options and Encode MP3 live.
They decide what kind of file you end up with, so each one gets a proper look in the sections below.
Should You Normalize When Exporting in Ableton?
Normalize works like an automatic volume knob.
Ableton Live looks at the whole export, finds the loudest peak, then turns the whole file up until that peak hits 0 dB.
0 dB is as loud as digital audio can go before it distorts.
It can turn a file down as well as up, so the level comes out consistent either way.
So when should it be on?
If you're sending a rough demo to a mate and you haven't done any mixing or mastering on the Main channel, it's useful.
It's especially good on a quiet mix, which otherwise has your mate reaching for the volume.
When should it be off?
Anything going to a mixing or mastering engineer.
They need headroom, which is the space between your loudest peak and 0 dBFS.
Bringing the track up to level is their job, so give them room to do it.
Leave it off if there's already a limiter on your track too.
If you've got a limiter on Main and want to know which mode stops overs getting through, my breakdown of the Ableton Live 12 Limiter covers True Peak and the other modes.
My rule is simple.
Quiet demo, Normalize on.
Track going for a mix or a master, Normalize off.
Which File Type Should You Export From Ableton?
The last area of the window decides how the audio gets packaged.
Encode PCM is on by default.
PCM stands for pulse code modulation, which in plain English is a way of storing digital audio.
It's how you get the highest quality file out of Ableton Live.
File Type gives you WAV, AIFF and FLAC.
Are they the same?
Functionally, yes.
Literally, no.
AIFF is more at home on Apple devices, and WAV was originally made for Windows.
Play them back and they sound exactly the same.
The difference is in how each file is formatted and encoded inside.
FLAC is lossless too, but it's compressed, so it comes in at roughly half the size of a WAV or AIFF.
If you're sending to mixing and mastering, I'd stick with WAV.
Encode MP3 sits underneath.
Turn it on alongside PCM and you get 2 files, a WAV and an MP3.
The MP3 is much smaller and compressed, which makes it perfect for sharing with a mate.
There are no settings to fiddle with.
It's always 320 kbps at a constant bit rate.
You can export the MP3 on its own by turning Encode PCM off.
Should You Export 24 or 32 Bit in Ableton?
Bit Depth gives you 32, 24 or 16.
Think of bit depth as the resolution of your audio's volume.
More bits means a lower noise floor and cleaner quiet detail.
24 bit is the universal standard, and it's my default for almost everything.
Finished tracks for streaming and stems for an engineer both go out at 24 bit.
There's one thing to watch out for.
Most DAWs run at 32 bit float internally.
That means your Main meter can sit in the red while you play the track and you won't hear it clipping.
Export that at 24 bit and the clipping is printed into the file.
So make sure nothing is clipping before you export.
Now, you're probably asking why not export 32 bit, then.
Only export 32 bit if the next person is carrying on in 32 bit, like a mastering engineer who has asked for 32 bit stems.
For a finished track going to streaming, there's no point.
16 bit is the legacy standard.
Use it for burning a CD or when someone specifically asks for it.
Otherwise, leave it alone.
Older samplers are the exception, and this one caught me out.
I was exporting 24 bit loops and one shots for a Roland SPD-SX, and they would not play through the sampler.
I was going mad until I read the manual.
It needed 16 bit.
If you're loading sounds into an old school drum machine or sampler, check the bit depth it wants first.
Dither Options sit right next to bit depth.
Dither is an incredibly quiet layer of noise.
Think of it as a digital cushion that smooths out the rounding errors you'd otherwise hear as distortion when audio drops to a lower resolution.
The only time I turn it on is when I'm going down to 16 bit.
When I do, I pick Triangular.
For a 24 bit export, leave it on No Dither.
Best Ableton Export Settings for Mixing and Mastering
Here's what I set when a track is going to a mix engineer.
Set the loop bracket over the whole song, with space at the end for tails.
Press Cmd+Shift+R.
Set Rendered Track to All Individual Tracks, or Selected Tracks Only if you're sending a few.
Turn Include Return and Main Effects off.
Turn off Render as Loop, Convert to Mono, Normalize and Create Analysis File.
Set Sample Rate to match your project.
Leave Encode PCM on, with WAV at 24 bit and No Dither.
Turn Encode MP3 off.
That's the cleanest way to export stems in Ableton for a mix.
For mastering, the settings are the same with 1 change.
Set Rendered Track to Main.
A mastering engineer only needs 1 stereo file, not a folder of stems.
The finished master going out to Spotify follows the same idea, a 24 bit WAV with Create Analysis File off.
If the mix itself is the part you're unsure about, my Ableton Live 12 course has a full module on mixing and mastering, from gain staging through to the final master.
Ableton Export Settings for Sharing a Demo or Making Loops
Sending a demo to a mate is the simplest export of the lot.
Set Rendered Track to Main.
Turn Encode PCM off and Encode MP3 on.
You get a single MP3 that's small enough to send anywhere.
If the mix is quiet and there's nothing on the Main channel, this is when Normalize earns its place.
Exporting loops for Splice or a sampler takes a few more switches.
Pick the track you want in Rendered Track, your drums for example.
Turn Render as Loop on so the loop repeats without a dip.
Turn Create Analysis File on, since it helps when the loop comes back into Ableton Live.
Match the sample rate to your project.
Leave Encode PCM on with WAV.
For an older sampler that needs it, set 16 bit with Triangular dither.
For loops going back into a DAW, set 24 bit with No Dither.
Whatever you're exporting, Ableton Live asks where to save it once you press Export.
I always put mine on the desktop so I can find it.
Then I move it across to cloud storage or an external SSD.
Name the file, press Save, and Ableton Live renders the audio offline.
A few minutes later, it's done.
Final Thoughts on Ableton Export Settings
The best Ableton export settings depend on where the file is going.
For almost everything, that means a 24 bit WAV at your project's sample rate, with Normalize off and nothing clipping.
Everything else in this article is a small change from that starting point.
I get it.
Ableton Live is confusing, and the export window is full of tiny buttons that are easy to get wrong.
It's also one of many settings in Ableton Live that can affect how things sound and how well it performs.
If you want the rest of Ableton Live set up properly from the start, here are the Ableton Live settings I'd turn off straight away, with the full walkthrough inside.
Frequently Asked Questions
Where does Ableton export files to?
Ableton Live asks you where to save every export.
When you press Export, a save window opens so you can pick the folder and name the file.
There's no fixed export folder, so the file goes wherever you point it.
I always save mine to the desktop so I can find it straight away.
Then I move it across to cloud storage or an external SSD.
Does Ableton export muted tracks?
No.
An export is an audio screenshot of what you hear when you press play, so a muted track stays out of the file.
Solo works the same way.
If a track is soloed, only that track ends up in the export.
In Session View, only the clips that are playing get exported.
Before you open the export window, mute anything you don't want and unsolo everything else.
Why does my Ableton export sound different?
The most common reason is clipping you couldn't hear.
Most DAWs run at 32 bit float, so the Main meter can sit in the red without audible distortion while you play the track.
Export at 24 bit and that clipping is printed into the file.
Pull the level down until nothing clips, then export again.
If it's your stems that sound different, check Include Return and Main Effects.
A limiter on Main reacts to each stem differently than it does to the whole mix.
What sample rate should I export at in Ableton?
Match the sample rate your project is running at.
You'll find it in Ableton Live's Audio settings, under In/Out Sample Rate.
My projects run at 44.1 kHz, so that's what I export at.
If you pick a lower rate than the project, Ableton Live exports at the project rate first, then converts the file down in a second step.
Unless someone has asked for a specific rate, keep it matched to the project.
Why is my Ableton export so quiet?
An unmastered mix sounds quieter than a released track because it hasn't been through mastering yet.
That's normal, and it isn't a problem with the export.
For a quick demo to a mate, turn Normalize on and Ableton Live raises the loudest peak to 0 dB.
For anything going to a mixing or mastering engineer, leave Normalize off.
Bringing the track up to level is their job, and they need the headroom to do it.
Does Ableton Live export in real time?
Not usually.
Ableton Live renders exports offline rather than playing the track through.
The exception is when your Set uses an External Audio Effect or External Instrument that routes to hardware.
Those tracks render in real time, with a 10 second countdown first so any sound from the hardware can die away.
Without hardware in the chain, you press Save and the export is done in a few minutes.
What are the best Ableton export settings for Spotify?
Export the finished master as a 24 bit WAV at your project's sample rate, with Main as the rendered track.
Leave Create Analysis File off, since the file isn't coming back into Ableton Live.
Leave Normalize off too, because a mastered track already has a limiter doing that job.
Check nothing is clipping before you press Export.
If your distributor asks for something different, go with what they ask for.
What is 32 bit float in Ableton Live?
32 bit float is the format most DAWs use to process audio internally.
It has so much headroom that a signal can go above 0 dB inside Ableton Live without clipping, which is why the Main meter can sit in the red and still sound clean.
The problem comes when you export at 24 bit, because that clipping gets printed into the file.
Only export at 32 bit if the next stage carries on in 32 bit, like a mastering engineer who has asked for it.
About the Author
Craig Lowe is a professional touring playback engineer, Ableton Live specialist and educator based in the UK.
He has over 10 years of teaching experience, online at Push Patterns and at universities including ICMP, BIMM, ACM and ThinkSpace Education.
His Ableton programming credits include Sam Fender, Melanie C, Years & Years and Skunk Anansie.
He runs Push Patterns, where over 1,000 students have learned to produce and perform with Ableton Live, at pushpatterns.com.
If you are interested in learning Ableton Live 12 or the Push 3 in a bit more detail, check the course here:
