
How to Make the RÜFÜS DU SOL Synth Sound in Ableton Live (Stock Plugins Only)
May 05, 2026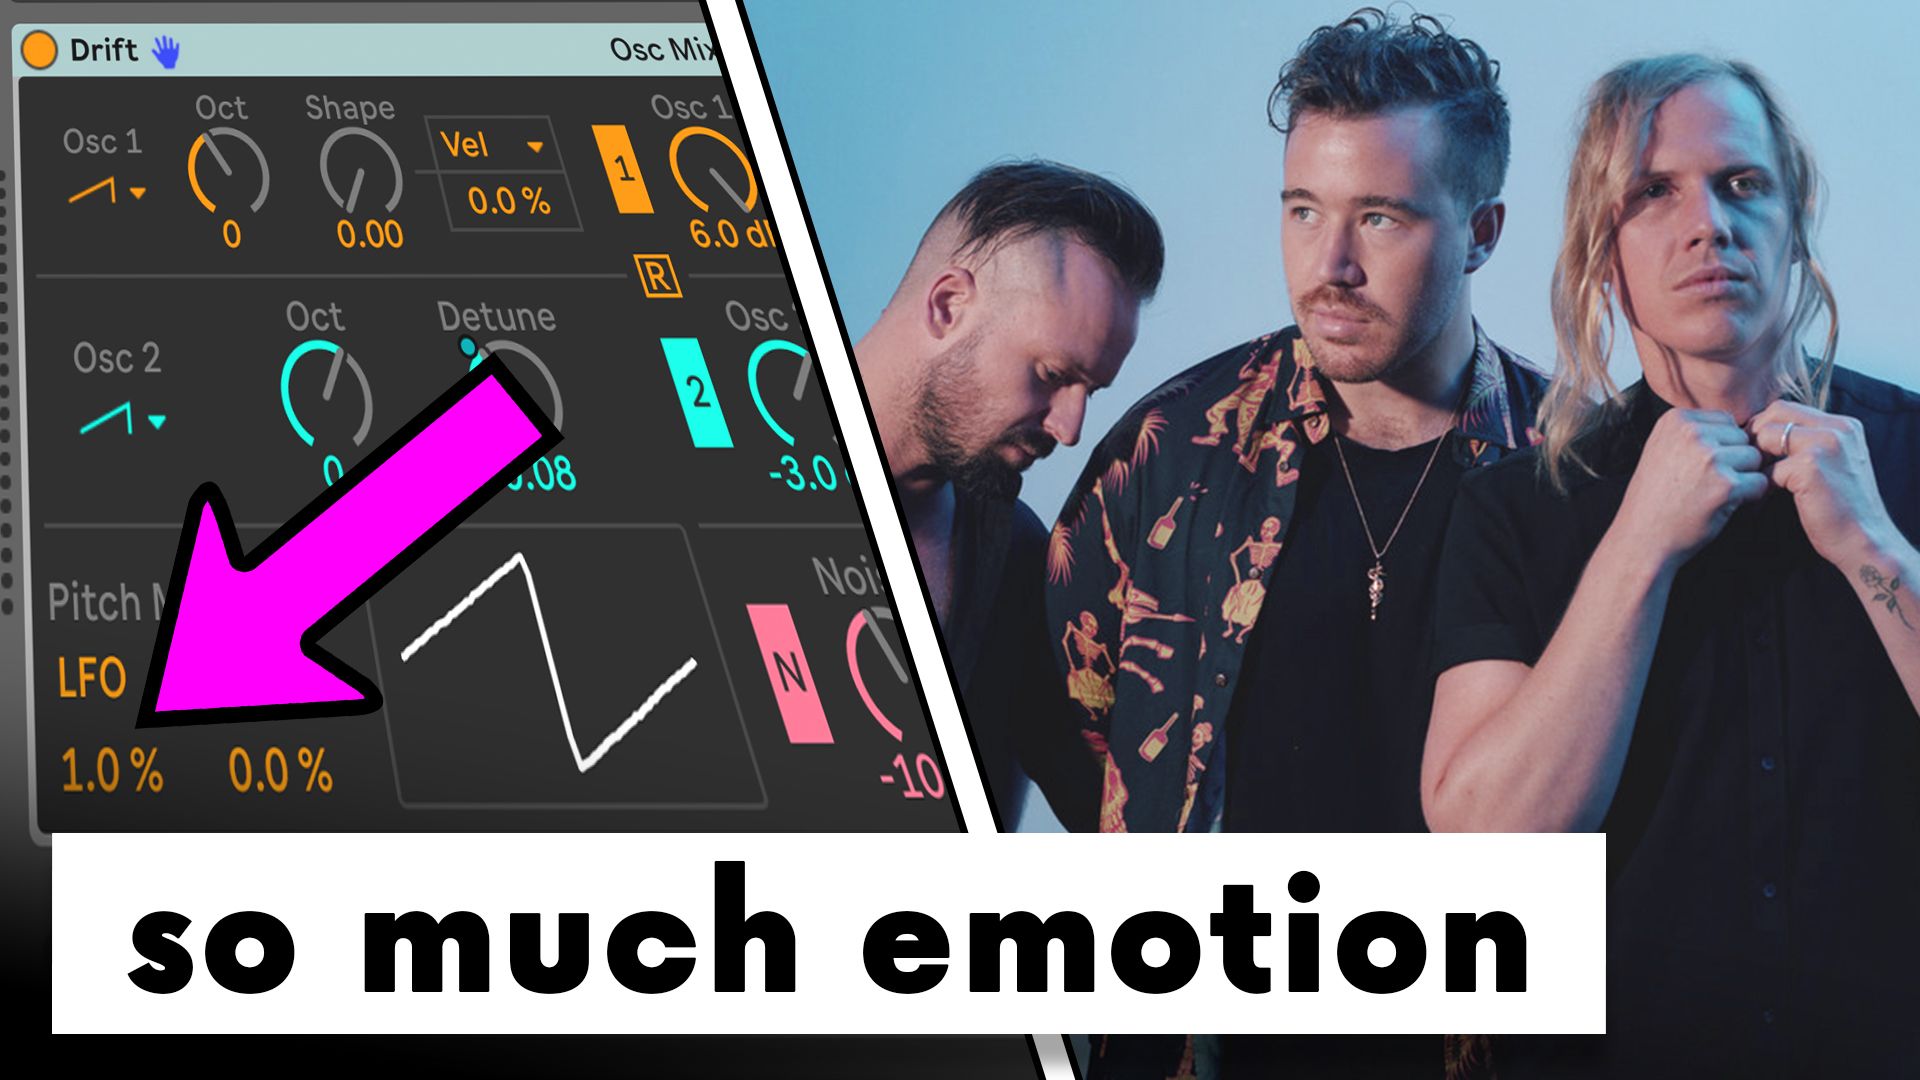
You know that synth sound in RÜFÜS DU SOL tracks like In Bloom.
The one with the emotion turned up to 11.
The good news is it's super simple to make, and you can build it entirely with Ableton sound design tools you already own.
No third-party VSTs.
No paid extras.
Just what's already there.
Here's how to do it.
Start With Drift
The synth we're using for this Ableton Live tutorial is Drift.
There's a specific reason for that choice rather than reaching for Wavetable or anything else, and it comes down to a feature most VSTs don't have.
More on that in a moment.
Drift is also available in every version of Live, so whatever edition you're running, you're covered.
If you're not sure what version of Ableton Live to get, or whether it's worth upgrading, this breakdown of every version of Ableton Live covers what each one includes and which one makes sense for you.
For the base sound, set up 2 oscillators, both running sawtooth waves.
Detune them slightly against each other.
Then drive 1 oscillator up so it's pushing into the signal and creating a little natural saturation, and pull the other back.
That asymmetry gives you a thick, harmonically rich texture rather than the clean, clinical sound you get from 2 oscillators sitting at equal levels.
Bring in a touch of noise and pull the filter back slightly.
Nothing dramatic.
Just enough to take the edge off the top end and add a little air to the sound.
That's the foundation.
It's a decent sound.
But on its own it's flat.
The next 2 steps are what turn it into something emotional.
Shape the Envelope
This is where the sound starts to breathe.
Set the envelope on both the amplitude and the filter.
Roll back the attack so the sound glides in rather than hitting hard.
Set a longer decay with zero sustain, and add a generous release so it fades out slowly rather than cutting off.
Play a note and feel the difference.
That slow rise and long tail is doing a lot of the emotional work already.
The sound is closer now.
But it still sounds like a synth doing its job rather than something that feels alive.
That distinction matters, and it's exactly what the next step addresses.
The Drift Trick That Changes Everything
Here's what makes Drift the right choice for this Ableton sound design technique.
That Drift button.
Switch it on and the 2 oscillators start drifting in and out of tune with each other.
Slightly wonky.
Slightly unstable.
Like something organic rather than something digital.
Set it to stereo as well and it starts to spread across the field.
If you want genuinely wide stereo pads without relying on a stereo spread, there's a technique that bands like RÜFÜS DU SOL, Bicep, and Radiohead use constantly, and I cover it in this post on getting wide stereo pads from a mono source.
Now here's the 1 dial that takes it to full RÜFÜS DU SOL territory.
Go to the modulation source on the pitch and set it to LFO.
Set the LFO shape to triangle and the rate to 3/8.
Then go to pitch mod and set it to 1%.
That's it.
The pitch is now gently, almost imperceptibly rising and falling in time with the track.
Not enough to sound out of tune.
Just enough to feel human.
Play around with the pitch mod amount.
More gives you more movement.
Less keeps it subtle.
There's no right answer, just what feels right for the track.
1 extra touch worth adding.
Set up a second LFO modulating the detune amount between the 2 oscillators.
It adds another layer of gentle movement and this Ableton drift tutorial approach takes the sound somewhere else entirely.
That's the RÜFÜS DU SOL emotional synth sound.
Built entirely through electronic music production inside Ableton Live 12.
No extra plugins required.
Key Takeaways
- 2 sawtooth oscillators with unequal drive gives you the texture. Running 1 oscillator hotter than the other creates natural saturation and harmonic richness rather than a clean dual oscillator tone.
- The envelope does most of the emotional heavy lifting. Slow attack, long decay, zero sustain, and a generous release is what gives the sound that slow rise and fade that feels affecting rather than mechanical.
- Drift's oscillator drift feature is the reason to use it. Switching on the Drift button introduces subtle pitch instability between the 2 oscillators, which is what makes the sound feel organic rather than digital.
- A 1% pitch LFO at 3/8 triangle is the key RÜFÜS DU SOL detail. It's subtle enough to stay in tune but just enough movement to feel human rather than static.
- A second LFO on the detune amount adds another layer of life. Modulating the detune between oscillators on top of the pitch LFO takes the sound from good to something genuinely distinctive.
Final Thoughts
Building the RÜFÜS DU SOL synth sound in Ableton Live comes down to a few deliberate choices rather than a complicated signal chain.
2 detuned sawtooth oscillators with asymmetric drive, a carefully shaped envelope, and then the specific combination of Drift's oscillator instability and a slow pitch LFO at 1%.
The result is a sound that moves and has that emotional quality that makes RÜFÜS DU SOL tracks feel different from most electronic music.
If you want to take this further, RÜFÜS DU SOL are also known for their incredibly lush, wide pads.
There's a simple technique called the Mono Stack Method that gets you there fast.
Head over to the Push Patterns YouTube channel where the full breakdown is waiting.
Frequently Asked Questions
What synths does RÜFÜS DU SOL actually use
Hardware wise, the band have used a Sequential Prophet 6, a Korg MS-20, a Moog Minimoog Model D, and a Dave Smith Mopho x4 across various albums and live setups.
For the Surrender album specifically, their keyboardist Jon George confirmed the Prophet 6 and MS-20 were run through Output Thermal for additional saturation.
Their go-to reverb and delay choices are Valhalla plugins.
None of that is stock Ableton.
The point of this post is that the emotional quality of that sound comes from synthesis decisions, not specific hardware, and those decisions translate completely inside Drift.
Does Ableton Drift come with every version of Live
Yes.
Drift is included in every version of Ableton Live from Intro upwards.
It sits alongside Simpler as one of only 2 instruments available to all Live users regardless of which edition they own.
So whether you're on Intro, Standard, or Suite, you have everything you need to build this sound without spending anything extra.
What does the Drift button actually do in Ableton Drift
The Drift button introduces subtle, randomised pitch instability between the 2 oscillators, mimicking the way analogue hardware synths naturally drift in and out of perfect tune due to temperature and voltage fluctuations.
The result is a sound that feels slightly alive rather than digitally static.
Set the voice mode to Stereo at the same time and that instability spreads across the stereo field, which is a big part of what gives this type of sound its width and warmth.
What is pitch modulation and why does 1% make a difference
Pitch modulation means using an LFO to gently raise and lower the pitch of a sound over time.
At high amounts it becomes obvious vibrato.
At 1% with a slow triangle wave, it sits below the threshold of something you consciously notice, but above the threshold of something your ear ignores entirely.
That's the zone where sound starts to feel human rather than mechanical.
It's the same principle behind why singers naturally fluctuate in pitch slightly and why that sounds more emotional than a perfectly static note.
Can you make RÜFÜS DU SOL style pads in Ableton with stock plugins too
Yes.
The emotional synth sound covered in this post is one piece of the picture.
Their pads are a separate technique built around layering and width rather than the oscillator instability approach used here.
There's a method called the Mono Stack Method that gets you into that territory quickly, also using Ableton stock tools.
That breakdown is available on the Push Patterns YouTube channel.
About the Author
Craig Lowe is a professional touring playback engineer and Ableton Live educator based in the UK.
He teaches at ICMP, BIMM, and ThinkSpace Education, and runs Push Patterns, a music production education brand at pushpatterns.com.
If you are interested in learning Ableton Live 12 or the Push 3 in a bit more detail, check the course here:
