
What Are Ableton Racks? How To Use Racks In Ableton Live
May 16, 2026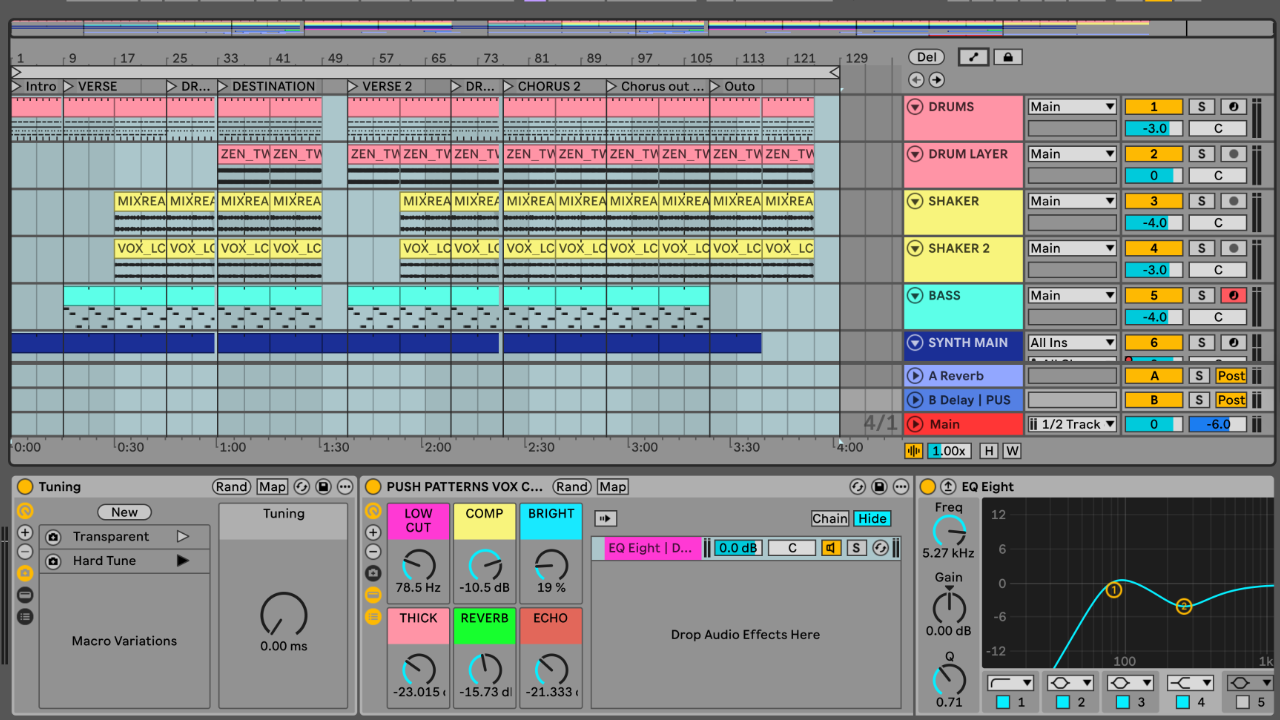
If you have been using Ableton Live for a while, you have probably seen the word Rack pop up in the browser.
Audio Effect Rack.
Instrument Rack.
Drum Rack.
MIDI Effect Rack.
You can use Ableton Live Racks to save your favourite plugin chains, build custom presets, layer instruments, create drum kits, map several controls to one Macro knob, set safe minimum and maximum values, and even switch between different sounds during a live performance.
I think Ableton Racks are one of the jewels in Ableton's crown.
They can look a bit confusing at first, but once you understand what they do, they become one of the biggest time savers in Live.
Most beginners think Racks are only for advanced sound design.
They are not.
They are for saving time.
They are for making your workflow faster.
This guide covers what Ableton Racks are, how each type works, how to build your first Rack, how Macros work, what Chain Selector does, and how Ableton Live Racks fit into real music production and live performance setups.
What Are Ableton Racks?
An Ableton Rack is basically a folder.
You can put devices inside it, save that setup, and recall it in another project whenever you need it.
That could be a chain of audio effects, a layered instrument, a full drum kit, or a MIDI effect setup that generates chords, melodies or rhythmic patterns.
Instead of rebuilding the same setup every time, you save it as an Ableton Rack and drag it into any project later.
Say you always use the same chain: EQ, compression, saturation, reverb, delay.
Instead of adding those devices one by one every time, you save the whole thing as an Ableton Audio Effect Rack.
Then you map the most important controls to Macro knobs, so instead of opening every plugin and tweaking loads of tiny settings, you have a few useful controls right at the front.
That is the real power of Ableton Racks.
They do not just hold devices.
They let you decide which controls matter.
Why Use Ableton Racks?
The main reason to use Ableton Racks is simple: they save time.
They let you save full chains of devices, build your own custom Ableton Rack presets, and control the most important settings from one place.
When I first started using Ableton, I slept on Racks for a while.
I saw them and thought I probably did not need that yet.
Then once I started using them properly, especially for saving chains and building performance controls, I realised how powerful they really are.
They are one of those features that can seem a bit boring until you use them for something practical.
Then you start thinking...
Oh, this is actually massive.
The Four Main Types Of Ableton Racks
There are 4 main types of Ableton Live Rack: Ableton Audio Effect Rack, Ableton Instrument Rack, Ableton Drum Rack, and Ableton MIDI Effect Rack.
Each one has a different job, but the basic idea is the same.
You are grouping devices together so they are easier to use, control and save.
Audio Effect Rack

An Ableton Audio Effect Rack lets you group audio effects into one device.
This is one of the most useful Ableton Live Racks for beginners because it is easy to understand straight away.
You take a few audio effects, group them together, map the controls you care about, and save the whole thing as an Ableton Rack preset.
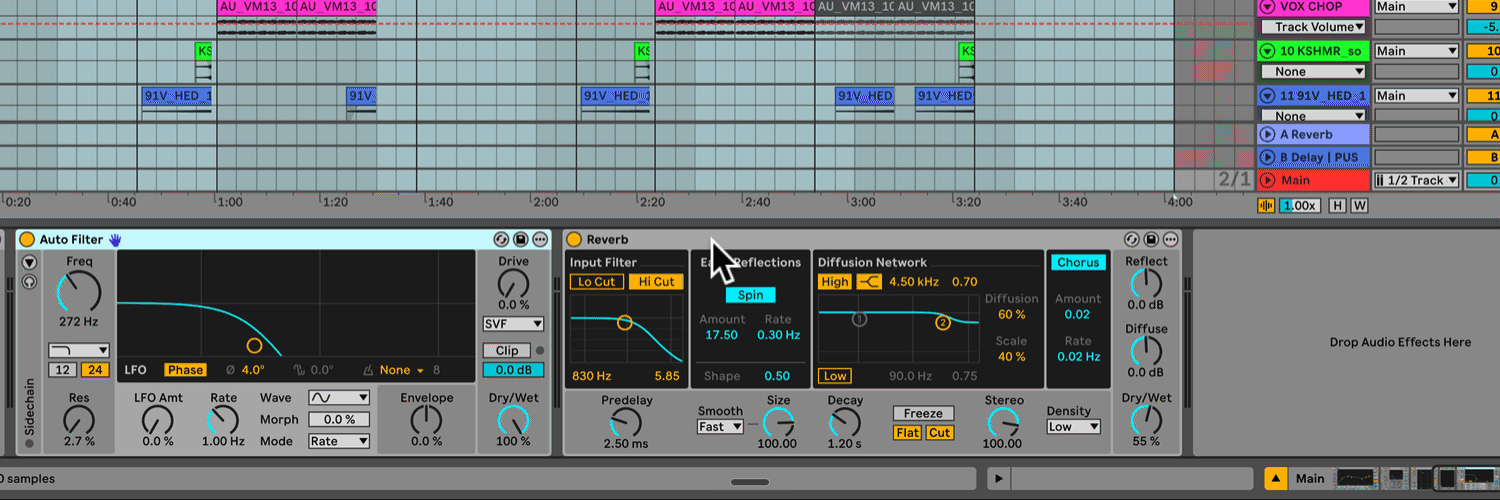
You could use an Ableton Audio Effect Rack for a vocal chain, a drum bus, a mastering chain, a filter sweep, a DJ-style transition effect, or a live performance master effect.
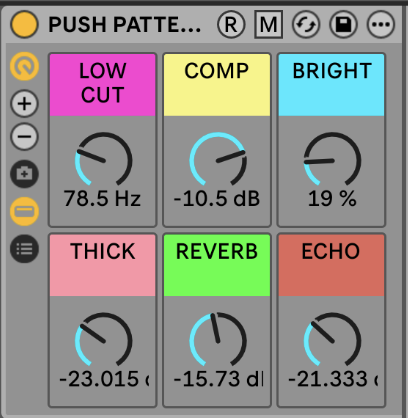
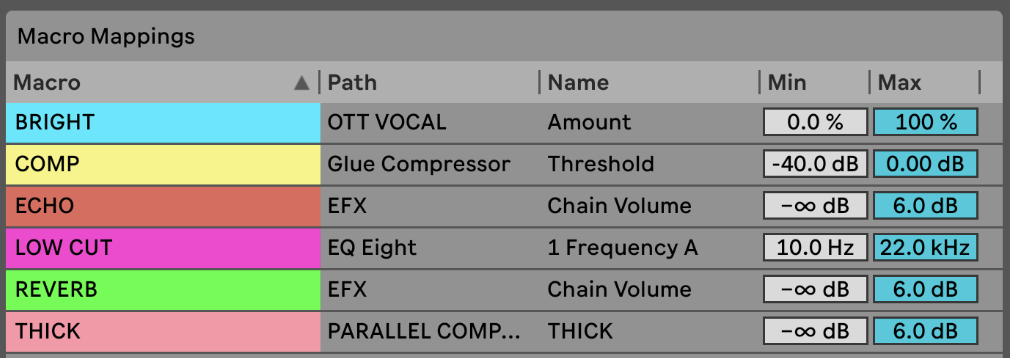
This is how my free Ableton vocal rack works.
I have EQ, compression and saturation settings that I keep reaching for, so instead of rebuilding that chain every time, I saved them inside an Ableton Audio Effect Rack with the useful controls mapped to Macros.
That means tweaking the vocal quickly without digging through every single device.
Instrument Rack

An Ableton Instrument Rack lets you combine instruments and effects into one playable device.
This is where things get really powerful.
You can use an Ableton Instrument Rack to layer 2 or more instruments, create big bass sounds, stack synths and samples, build keyboard splits, trigger different sounds with different velocities, or switch between instruments with Chain Selector.
You can also split the keyboard so that C1-C2 have a bass sound, and C2 and up have a pad sound. This is really great for studio and live performance use
Drum Rack
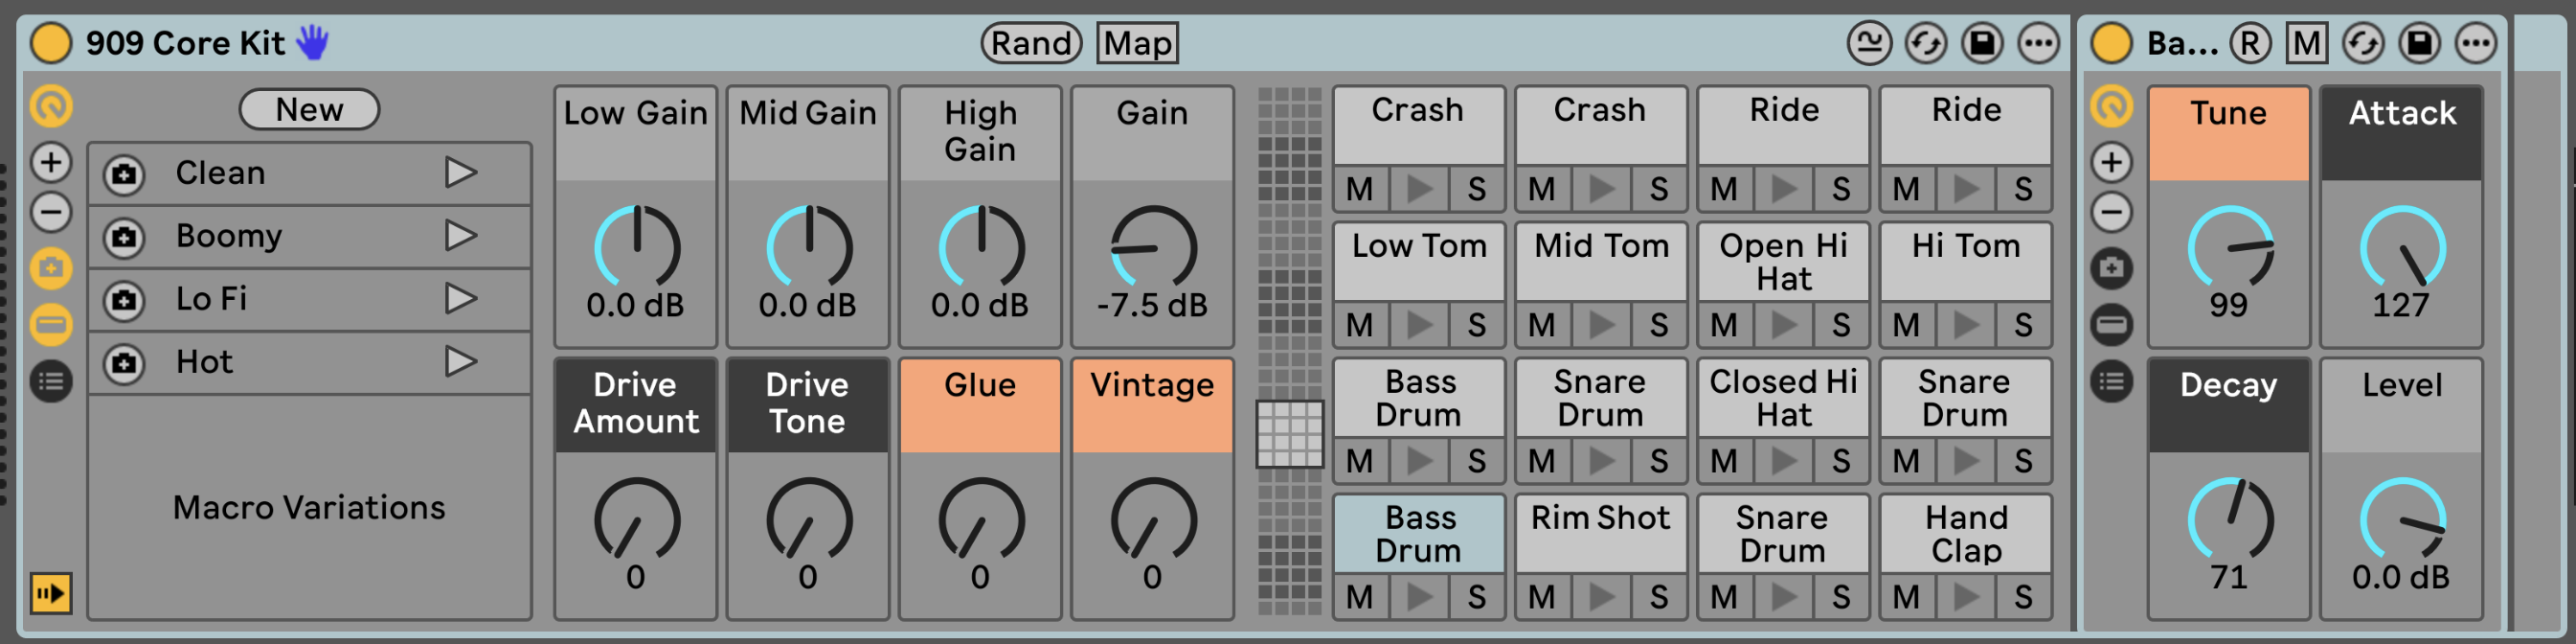
An Ableton Drum Rack is used for building drum kits.
If you have ever loaded drum samples onto pads in Ableton, you have used an Ableton Drum Rack.
Each pad can hold a sample, an instrument, or a whole chain of effects.
Ableton Drum Racks are especially useful with Push because the pads line up with the Drum Rack layout.
So if you are making beats, finger drumming, or building custom sample kits, the Ableton Drum Rack is one of the most important parts of Ableton Live.
MIDI Effect Rack
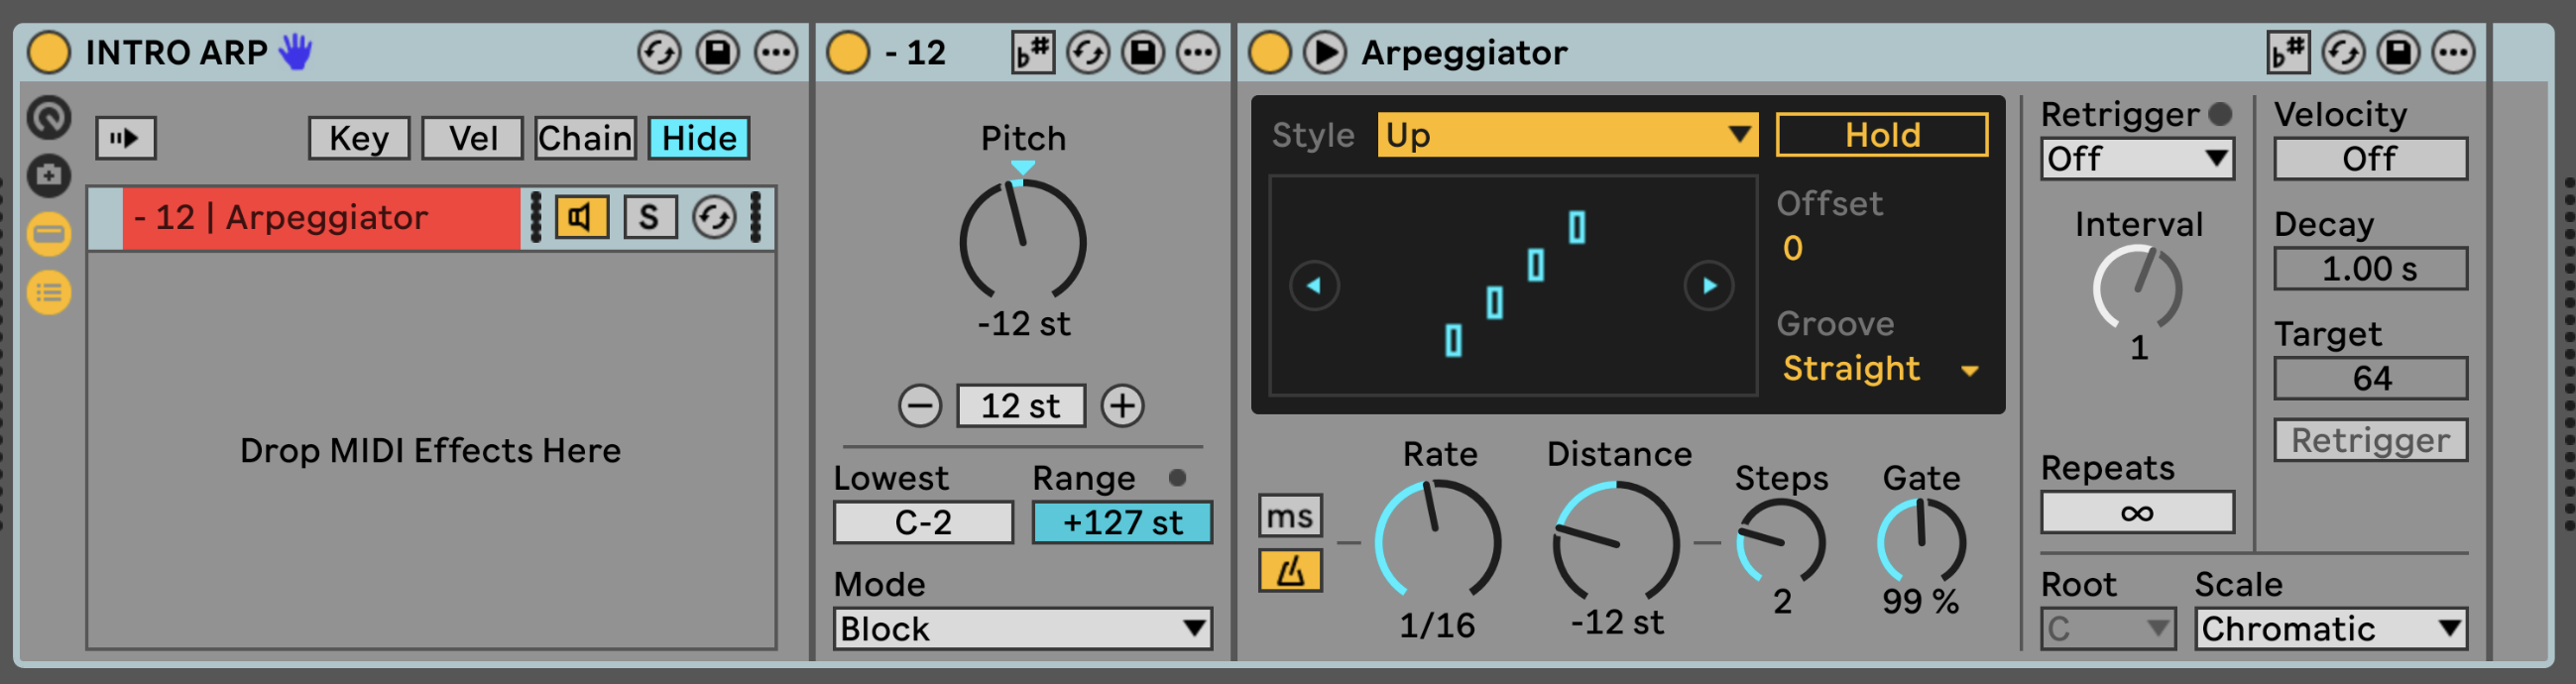
An Ableton MIDI Effect Rack lets you group MIDI effects together.
You might use an Ableton MIDI Effect Rack for chord devices, scale devices, arpeggiators, random melody tools, velocity control, or creative MIDI generators.
For example, you could build an Ableton MIDI Effect Rack with Chord, Scale and Arpeggiator, then map the important settings to Macros.
That way, you can generate musical ideas quickly without rebuilding the same MIDI chain every time.
How To Build An Ableton Rack
The simplest version to start with is an Ableton Audio Effect Rack.
Add an audio effect to a track, something like Auto Filter.
Add any other effects you want alongside it, maybe Reverb, Delay or Saturator.
Select all the devices by clicking the first one, holding Shift, and clicking the last.
Press Cmd + G on Mac or Ctrl + G on Windows to group them into an Ableton Rack.
You will now see Macro knobs at the front of the Rack.
Click Map, then click the parameter you want to control, and assign it to a Macro.
Press Cmd + R to rename the Macro something useful, like Filter Sweep.
Set the minimum and maximum values so the Macro only moves within a range that sounds good.
Then drag the Ableton Rack preset into your User Library so you can use it again in any future project.
That is the whole idea.
You build a chain, group it, map the important controls, and save it.
How Macro Controls Work In Ableton Racks
Macros are the big controls at the front of an Ableton Rack.
They let you control one or more parameters from one knob.
This is where Ableton Live Racks become properly useful.
You are not just hiding a bunch of devices inside a box.
You are creating your own custom control panel.
One Macro could control filter frequency, reverb dry/wet, delay feedback, saturation drive, compressor threshold, or even a device on and off switch.
But the really powerful part is that 1 Macro can control multiple things at the same time.
So you could have one Macro called Build Up that opens a filter, increases reverb, increases delay feedback, adds saturation, and turns on a transition effect, all from one knob.
That is where Ableton Live Racks become more than just presets.
They become performance tools.
Why Minimum And Maximum Macro Values Matter
This is one of the most underrated parts of Ableton Racks.
When you map a parameter to a Macro, you can set the minimum and maximum range.
That means the Macro does not have to control the full range of the original parameter.
This is huge for live performance.
If you map a high-pass filter directly with no limits, you might push it too far and make the track sound thin.
That is not what you want on stage.
You do not want to be carefully moving a knob by tiny amounts while trying not to ruin the track.
You want to grab the knob and push it with confidence.
Inside an Ableton Rack, you can set the maximum value so the filter stops at a safe point.
Instead of letting it sweep all the way up, you make it stop around 2 kHz.
Now you can slam the Macro all the way up and know it will not destroy the sound.
That is the difference between a normal MIDI mapping and a proper performance control.
You can do the same in reverse with a low pass filter, setting a minimum so it never closes too far.
You get the movement and energy of the sweep, but you do not completely kill the track.
Mapping Device On And Off Controls
Another powerful trick is mapping a device's on and off button to a Macro inside an Ableton Rack.
This can be a little confusing at first, but it is really useful for live performance.
You might have a filter sweep where the filter turns off once the Macro reaches a certain point.
That means you sweep up, push it a little further, and the effect turns off so the full track drops back in.
That is a brilliant live performance move.
You are not thinking about the technical setup on stage.
You are grabbing one control and making something musical happen.
How To Save An Ableton Rack As A Preset
Once you have built an Ableton Rack, save it into your User Library.
You can do this by simply clicking the little save icon at the top of the rack.

This is one of the biggest reasons to use Ableton Live Racks and one of the things people forget to do.
If you keep using the same vocal chain, save it as a vocal Ableton Rack preset.
If you keep using the same drum bus processing, save it as a drum bus Ableton Rack preset.
If you keep building the same filter sweep for transitions, save it as a performance Ableton Rack preset.
Your User Library should become a collection of your best tools.
Your own Ableton Rack presets, built around the way you make music.
What Is Chain Selector In Ableton Racks?
Chain Selector is one of the most powerful parts of Ableton Racks, but the name makes it sound more complicated than it needs to be.
Honestly, I think it should be called Channel Selector.
That would make it much easier to understand straight away.
Inside an Ableton Rack, you can have different chains, and each chain is like its own lane.
Each chain can hold a different sound, instrument, effect chain or processing setup.
Chain Selector lets you choose which chain is active.
Inside an Ableton Instrument Rack, for example, you could have a bass sound, a lead sound, a pad sound, a white noise riser and a transition effect, all in separate chains.
Move the Chain Selector and you choose which one plays.
You can automate the Chain Selector so that different sounds turn on at different points in the song.
It is almost like a patch change on a keyboard, but inside Ableton.
That is the kind of thing that makes Ableton feel different from other DAWs.
Ableton Live is a live performance tool at heart.
It just happens to be brilliant in the studio as well.
How Chain Selector Helps With Live Performance
In a live set, you do not want to load a new instrument manually for every song.
You do not want to be digging through plugins on stage.
With Chain Selector inside an Ableton Instrument Rack, you can build a Rack with different sounds or effects inside it, then automate which one is active for each song or section.
Song 1 uses Chain 1, Song 2 uses Chain 2, Song 3 uses Chain 3.
Or inside one track: verse uses a clean synth, build uses a filtered version, drop uses a bigger layered sound, breakdown uses a pad, transition uses a riser.
This is where Ableton Instrument Racks become really powerful.
You can use them almost like a performance patch system.
And because it is all inside Ableton, you can save the Rack, automate it, map it, and reuse it.
Beginner Rack Example 1: Filter Sweep Rack

If you are new to Ableton Racks, a simple filter sweep Rack is the first one to build.
It is easy to understand, but it teaches you the important concepts: how to group an effect into an Ableton Audio Effect Rack, how to map a Macro, how to rename it, and how to set minimum and maximum values.
Add Auto Filter to an audio track.
Group it into an Ableton Audio Effect Rack with Cmd + G on Mac or Ctrl + G on Windows.
Open the Macro controls and map the filter frequency to Macro 1.
Rename it Filter Sweep.
Set the minimum and maximum range so the sound stays musical.
Add Reverb or Delay after the filter if you want it to feel more like a transition effect.
Map the dry/wet control to another Macro.
Save it to your User Library as an Ableton Rack preset with a clear name.
That is a Rack you can actually use.
Beginner Rack Example 2: White Noise Riser Rack

A white noise riser Ableton Instrument Rack is another great starting point, especially useful for buildups, transitions and live performance.
Create a MIDI track and add Analog.
Turn off OSC 1 and 2 and just keep the noise on
Add a filter and use a band pass or high pass movement.
Group them to create the instrument rack
Map the filter frequency to a Macro.
Add Reverb and Delay, and map the dry/wet controls to separate Macros.
Save it as an Ableton Rack preset so you can use it again.
Now you have a custom riser you can play and perform in real time, from subtle to huge, without dragging in the same sample every time.
( notice how you can have instruments and audio effects in the same rack. Another cool thing is you can have racks within, racks within, racks within, racks. It's a bit like the movie Inception )
Beginner Rack Example 3: Vocal Chain Rack

A vocal Ableton Audio Effect Rack is one of the most practically useful Racks you can build.
If you are recording or processing vocals, you probably use the same basic chain every time: EQ, compression, saturation, de-essing, reverb, delay.
Instead of rebuilding that every session, save it as an Ableton Audio Effect Rack.
Map the controls that actually matter: brightness, compression, saturation, reverb, delay, output level.
That is why I built my free Ableton vocal rack.
It gives you a practical starting point for processing vocals in Ableton Live without building the chain from scratch every time.
If you want a ready-made starting point, you can download the free Ableton vocal rack here and load it straight into any project.
Should Beginners Use Ableton's Built-In Rack Presets?
Yes.
One of the best ways to learn Ableton Live Racks is to open the built-in Ableton Rack presets from the Core Library and reverse engineer them.
Open them up, look at the Macros, see what is mapped, look at the chains, and look at how the controls are named.
Do not panic if some of them look complicated.
Some of Ableton's built-in Ableton Rack presets are pretty deep, and that does not mean you need to build something that complex straight away.
Start simple.
One of my favourites in the Core Library is Super Looper.
You catch a piece of audio, loop it back, map it to a controller, and suddenly you sound like you have built some genius live performance setup.
That is the fun of Ableton Live Racks.
They can be practical, but they can also be properly inspiring.
Are Ableton Racks Good For Push?
Yes.
Ableton Live Racks are brilliant with Push because it speeds up the workflow and loading devices. If you've used the Push 3 before, you'll know one of the downsides is choosing and loading instruments and devices, and generally navigating around the browser. This speeds up that workflow
Instead of opening lots of devices, you map the important controls to Macros and control them from Push directly.
This is especially useful for filter sweeps, performance effects, instrument controls, drum processing, white noise risers and live transitions.
If you want to learn how to use Racks and Macros properly on the hardware, the Ableton Push 3 course covers this step by step, alongside everything else you need to get started with Push.
Common Mistakes With Ableton Racks
The biggest mistake beginners make with Ableton Live Racks is not using them enough.
That is it.
They see them as advanced, think they are only for sound design, and ignore them because Ableton already has enough going on.
I get it.
When you are new, even basic devices can feel like a lot.
But Ableton Racks are worth learning because they pay you back over and over again.
Once you start saving your own chains, mapping macros, and building reusable tools, Ableton starts to feel much more personal.
It becomes your setup, not just Ableton's default setup.
A few things to watch out for specifically.
Do not make Ableton Racks too complicated too soon.
Start with a filter Rack, a vocal Rack, or a simple Ableton Instrument Rack with 2 layered sounds.
Rename your Macros properly.
Macro 1, Macro 2 and Macro 3 are not helpful names on stage.
Set safe minimum and maximum values.
Do not just map a parameter and leave it wide open.
And save your best Ableton Rack presets to your User Library.
If you build something useful, keep it.
Are Ableton Racks Only For Advanced Users?
No.
This is probably the biggest misunderstanding about Ableton Live Racks.
You group things together, map the controls you care about, and save the result.
You do not need to understand every advanced feature to start using Ableton Racks.
You can start with 1 audio effect and 1 Macro inside an Ableton Audio Effect Rack.
That is still a Rack.
Then, over time, you add more.
Are Ableton Racks Good For Music Production?
Yes.
For music production, Ableton Live Racks are brilliant because they help you build repeatable workflows.
You can use them for sound design, mixing, vocals, drums, bass processing, creative effects, transitions, and saving your favourite Ableton Rack presets.
The real win is speed.
You are removing repeated work, saving the stuff you use all the time, and building your own production system inside Ableton.
If you are still building your foundations in Ableton Live and want a structured path through all of this, the Ableton Live 12 course covers Racks, Macros and the full production workflow from the ground up.
Are Ableton Racks Good For Live Performance?
Yes.
For live performance, you need control, but you also need safety.
You do not want to be tweaking tiny plugin parameters on stage.
You do not want a filter sweep that accidentally wipes out your whole track.
You do not want to load different instruments manually between songs.
Ableton Live Racks help solve those problems.
You can build safe Macro controls, set minimum and maximum values, create master performance effects, switch sounds with Chain Selector inside an Ableton Instrument Rack, build white noise risers, and map everything to Push or a MIDI controller.
This is why I use Ableton Racks so much in live performance.
The setup might be a bit fiddly.
But once it is done, the performance becomes easier.
And that is exactly what you want.
If you want to take this further and build a full reliable live set around Ableton Racks, the Ableton Live Performance Course covers exactly how to do that using the SAFE System, built from years of touring experience.
Ableton Racks: Key Takeaways
- Racks are for saving time, not just sound design. Most beginners think Ableton Racks are an advanced feature. They are not. They are for removing repeated work and building tools you can actually use.
- Macros let you decide which controls actually matter. Instead of digging through every device, you map the useful controls to the front of the Ableton Rack and ignore the rest.
- Minimum and maximum values turn Macros into performance controls. Setting a safe range means you can grab a knob and push it with confidence on stage, not carefully nudge it by tiny amounts.
- Chain Selector is more powerful than it looks. It lets you switch between completely different sounds inside one Ableton Instrument Rack. Automate it and you have a performance patch system.
- Save your best Ableton Rack presets to your User Library. Every time you build something useful, save it. Your library should be a collection of your own tools, built around the way you actually make music.
- Start simple. One audio effect, one Macro, one saved Ableton Rack preset. That is enough to start. The rest follows naturally.
Final Thoughts: Ableton Racks Are Worth Learning Early
Ableton Racks can look confusing at first.
I get why beginners avoid them.
You are already trying to learn Ableton Live, and then suddenly there is another layer: Ableton Racks, Macros, Chains, Chain Selector.
But once you understand the basic idea, Ableton Live Racks become one of the most useful features in Live.
They help you save time, save your favourite chains, build custom Ableton Rack presets, create simple controls for complicated setups, and make safer live performance tools.
That is why I think Ableton Racks are one of the jewels in Ableton's crown.
They are not just for sound design.
They are for workflow, for speed, for live performance, and for building your own version of Ableton around the way you actually make music.
Start simple.
Build a filter sweep Ableton Audio Effect Rack.
Save a vocal chain.
Layer 2 instruments inside an Ableton Instrument Rack.
Map 1 Macro.
Set a minimum and maximum value.
That is enough to get started.
And once it clicks, you will probably end up using them everywhere.
Because once you get it, Ableton Racks become one of those features you wonder how you ever worked without.
Frequently Asked Questions
What are Ableton Racks used for?
Ableton Racks are used to group instruments, audio effects, MIDI effects or drum sounds into one reusable device inside Ableton Live.
You can use them to save presets, build custom chains, map Macro controls, layer sounds, create drum kits and build live performance tools.
The real power is not just storing devices together.
It is being able to decide which controls actually matter and put them right at the front.
Once you start using Racks properly, they become one of the biggest workflow improvements in Live.
What is an Audio Effect Rack in Ableton?
An Ableton Audio Effect Rack lets you group multiple audio effects into one device.
For example, you could save EQ, compression, saturation, reverb and delay as one vocal processing Rack.
Instead of rebuilding that chain every session, you save it once and drag it into any project.
You can then map the most important controls to Macro knobs so you are not digging through every plugin to make adjustments.
It is one of the most practical Racks to build first because the benefit is immediately obvious.
What is an Instrument Rack in Ableton?
An Ableton Instrument Rack lets you combine instruments and effects into one playable device.
You can use it to layer synths, split sounds by velocity, build performance instruments and switch between sounds with Chain Selector.
It is where Ableton Racks get really powerful for live performance, because you can have multiple completely different sounds inside one Rack and automate which one is active at any point.
Building a white noise riser inside an Ableton Instrument Rack is one of my favourite examples of what these can do in a real performance context.
What is a Drum Rack in Ableton?
An Ableton Drum Rack lets you load drum sounds, samples or instruments onto pads.
It is commonly used for beat making, sample kits, Push workflows and drum programming.
Each pad can hold its own sample, instrument or even a chain of effects, so you can process each drum sound individually.
Ableton Drum Racks work especially well with Push because the pads map directly to the Drum Rack layout.
If you are making beats in Ableton, the Drum Rack is one of the first things worth getting comfortable with.
What is a MIDI Effect Rack in Ableton?
An Ableton MIDI Effect Rack lets you group MIDI effects together before they reach an instrument.
You can use it for chord tools, arpeggiators, scale devices, velocity shaping and creative MIDI generation.
The key thing to understand is that it is not processing audio.
It is shaping the MIDI information on its way into an instrument.
Building an Ableton MIDI Effect Rack with Chord, Scale and Arpeggiator mapped to Macros is a great way to generate musical ideas quickly without staring at a blank MIDI clip every session.
How do I make an Ableton Rack?
Select one or more devices in your device chain, then press Cmd G on Mac or Ctrl G on Windows.
Ableton will group those devices into a Rack automatically.
You can then open the Macro controls, click Map, and assign the parameters you want to control to individual Macro knobs.
Rename each Macro so it is clear what it does.
Set minimum and maximum values so the controls stay within a useful range.
Then save the Rack into your User Library so you can use it again in any future project.
Can I use third party plugins in Ableton Racks?
Yes.
You can use third party plugins inside Ableton Racks as long as they are loaded in Ableton Live.
This is useful for saving plugin chains and creating custom Macro controls around your favourite VSTs.
Instead of opening a third party plugin and adjusting it manually every session, you save the whole setup as an Ableton Rack preset with the important controls mapped to Macros at the front.
It works with both VST and Audio Unit formats, and the saved Rack travels with your User Library between projects.
Can I save Ableton Racks as presets?
Yes.
Once you have built a Rack, drag it into your User Library in the Ableton browser and give it a clear name.
From that point, the Ableton Rack preset is available in every project.
This is one of the most underused things in Ableton.
Most people rebuild the same chains over and over without realising they could save them once and reuse them indefinitely.
Your User Library should become a collection of your own tools built around the way you actually make music, not a folder full of factory presets you never touch.
What are Macro controls in Ableton?
Macro controls are the knobs at the front of an Ableton Rack.
They let you control one or more parameters from one place, so instead of opening every device and tweaking individual settings, you put the controls that actually matter right at the front.
You can also set minimum and maximum values to control exactly how far each parameter moves when you turn the knob.
That is what makes Macros genuinely useful for live performance.
You are not just creating a shortcut.
You are building a safe, musical control you can use with confidence on stage.
What is Chain Selector in Ableton?
Chain Selector lets you choose between different chains inside an Ableton Rack.
You can think of each chain like a different channel or lane, each holding its own sound, instrument or effect setup.
It is especially useful for switching sounds, creating layered instruments and building live performance setups.
Inside an Ableton Instrument Rack you could have a completely different sound in each chain, then automate the Chain Selector so the right sound turns on at the right point in your set.
Honestly, I think it should be called Channel Selector.
That name would make it much easier to understand straight away.
Are Ableton Racks useful for live performance?
Yes.
Ableton Racks are extremely useful for live performance because you can build safe performance controls, map them to hardware, set minimum and maximum values, and switch between sounds using Chain Selector.
The setup takes time, but once it is done the performance becomes much easier.
You are not digging through plugins on stage or worrying about sweeping a filter too far.
You grab a knob and something musical happens.
That is the whole point.
Racks let you do the complicated technical work in advance so that performing feels simple and controlled.
Do Ableton Racks work with Push?
Yes.
Ableton Racks work really well with Push because the Macro controls can be accessed directly from the hardware.
This makes it easier to perform, tweak sounds and control your own custom setups without using the mouse.
Map your most important controls to Macros inside an Ableton Audio Effect Rack or Ableton Instrument Rack, and those controls are right there on Push whenever you need them.
Once you understand how Ableton Racks and Macros work together, Push becomes a significantly more powerful tool both in the studio and on stage.
About the Author
Craig Lowe is a professional touring playback engineer and Ableton Live educator based in the UK.
He teaches at ICMP, BIMM, and ThinkSpace Education, and runs Push Patterns, a music production education brand at pushpatterns.com.
If you are interested in learning Ableton Live 12 or the Push 3 in a bit more detail, check the course here:
